Silicone rendering
Silicone rendering in Harrogate
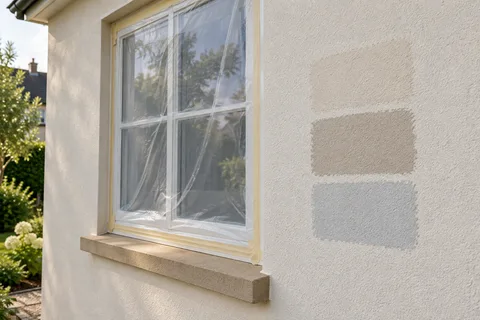
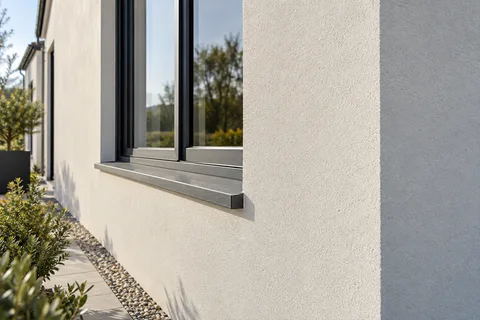
Silicone render is a ready-mixed resin finish, applied over a cement-based base coat, that sheds rain at its surface while letting water vapour out. People choose it for clean colour, a fine texture and because it stays cleaner for longer than painted render. On a Harrogate house it is most at home on an extension, a rendered Edwardian upper storey or new blockwork; it is not a treatment for bare sandstone.

On this page
What the layers are
Silicone is the last few millimetres of a system, not the whole thing. Taking K Rend’s system as one example: the wall gets a cement-based, polymer-modified base coat such as HP14, which its data sheet gives as a nominal 4 to 6 mm in one coat, with alkali-resistant glass-fibre mesh bedded into it where the specification calls for it. After the base coat has stood (K Rend asks for at least 14 days), a colour-matched primer is rolled on and left for 24 hours. The topcoat, Silicone TC, is then applied only to the thickness of its largest grain: 1.5 mm for TC15 and 3 mm for TC30.
So the visible finish is thin, but on those figures the whole build-up over the masonry is roughly 6 to 9 mm. That matters next to Harrogate’s stone dressings. A sandstone window surround that stands only slightly proud of the old render can look noticeably shallower once a new system is added on top, unless the old render comes off first.
- Sound background A background accepted by the specified system. Keeping old render requires a system-specific assessment of its bond and condition.
- Beads Corner, stop and base beads set the edges and straight lines.
- Basecoat with mesh Glass-fibre mesh embedded in the basecoat resists cracking.
- Primer Where the system requires it, tinted towards the finish colour.
- Silicone finish A thin, through-coloured, water-repellent coat that forms the texture.
Wall on the left, finish on the right. Not to scale: coats, thicknesses and primers follow the chosen manufacturer’s system and the condition of the wall.
When it is the right choice, and when it is not
Silicone works well on sound brick or block, on new extensions, over existing render that is firmly bonded once it has been cleaned and base-coated, and as the finish on external wall insulation. Its silicone resin makes the surface water-repellent, and K Rend’s product includes a biocide to help prevent moulds and algae, which is why silicone finishes are often picked for north-facing or tree-shaded walls that turn green under paint.
It is the wrong choice where an older solid sandstone or rubble wall needs to dry through a soft, open surface; lime suits that wall better. It is also wrong where the real problem is hollow render underneath, because a thin coat cannot hold a failing layer on. And in a conservation area, putting it onto stone or brick that has never been rendered is likely to need planning permission.
How it goes on
The order is base coat, primer, topcoat. The topcoat is laid on with a stainless steel float, allowed to take up slightly and then rubbed in circles with a plastic float to raise the grain. Each continuous wall face has to be finished in one go, working to a wet edge, because a line forms wherever one section dried before the next was joined to it. A large gable therefore needs enough hands on the scaffold to finish it in one session, and corners and downpipes are used to divide the work.
Repair and clean the wall; remove hollow render.
Fix beads at the DPC, corners, reveals and stone junctions.
Apply the base coat and bed mesh into it.
Leave the base coat for the manufacturer’s minimum curing time.
Roll on the colour-matched primer and let it dry.
Float on the topcoat to grain thickness and rub up the texture.
Keep it out of rain and strong sun until it has dried.
Details that go wrong
The base coat is where most problems are made. If it is too thin at window corners, or the mesh is not lapped, diagonal cracks run out from the corners of openings. If the topcoat goes on in strong sun or wind, or onto a damp or frozen wall, it can dry patchy; K Rend’s data sheet rules out those conditions and sets a 5°C minimum. If the render is taken down over the damp-proof course instead of stopping on a bell-cast bead, the bottom edge stays wet and marks.
Sills need watching too. The appraisal notes that window sills in the town centre project generously forward of the walls, and that projection is what throws water clear. Where a new build-up eats into it, a sill extension or a new sill may be needed so the drip still works.
Living with it
Silicone render is not maintenance-free. Dirt and algae still settle on ledges and below drips, only more slowly. Wash it with a soft brush and a cleaner made for render rather than a high-pressure jet, which can damage the grain. Small knocks can be filled and touched in using the original colour reference, so keep the product name, grain size and colour code. If you later want a different colour, the surface can be recoated with a compatible coating instead of being re-rendered.
Common questions
How thick is silicone render?
The silicone topcoat is applied only as thick as its grain, 1.5 to 3 mm in K Rend’s range, but it sits on a base coat several millimetres thick. Ask for the whole build-up when checking how the work will meet stone surrounds and sills.
See housing and planning information for Harrogate and nearby places, including the source and geography behind each figure.